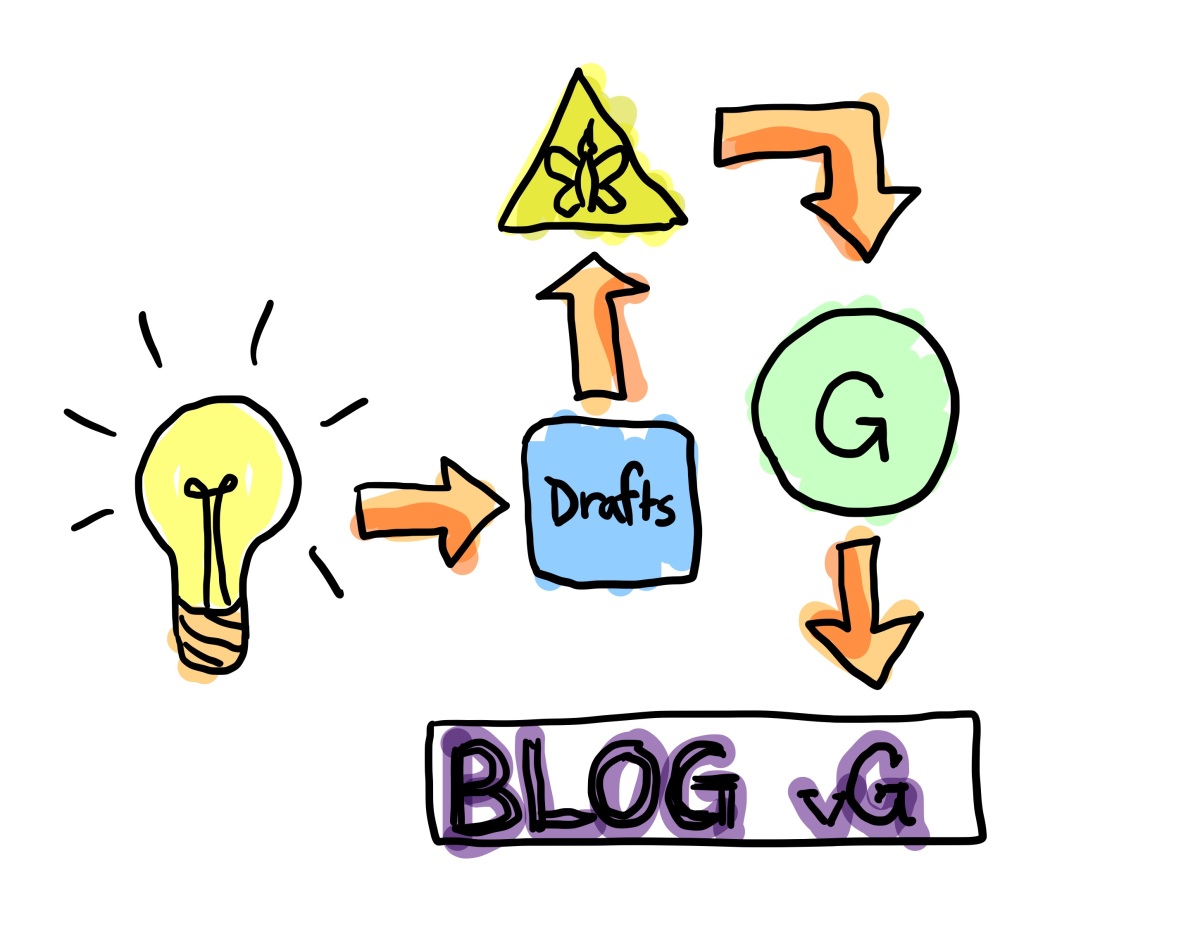
I am still working through my workflow, but similar to a productivity system, it should be a living thing that evolves with you as you continue to learn and grow.
In my quest to create more content, I have run into various problems that I needed to solve for, so here are some things that I have learned. Hoping they can help others as well. I have to be honest that I stole most of what I talk about, but modified things slightly for my wants/needs. A lot of this came from MacSparky’s workflow.
Workflow Requirements
- Idea generation
- Content creation
- Editing/grammar checking
- Reflection
- Publishing
Let’s unpack these one at a time.
I put a list of the tools/apps I use at the end of this article in case anyone is interested.
Idea Generation
I have gotten inspiration from both David Sparks at MacSparky as well as Shawn Blanc, who I found through the MacSparky blog! I have purchased most of the available training from Shawn Blanc’s sites, The Sweet Setup, and The Focus Course. Both David and Shawn talk a lot about their creative process for their blogs, and it helped me grapple with my desire to blog more. So, here are the basics of my idea generation and capture process.
Reading — Both reading books as well as listening to books via audiobooks. I try to learn all the time, and in this process, lots of great ideas come to me. If I get an idea while I am driving and listening to an audiobook, I simply open Drafts from my Apple Watch and speak the idea into my watch. That converts my speech into text, and it’s sitting in my Drafts inbox (on all my devices) for when I can get to it later. I use this method even if I’m not driving because it’s so damn easy! If you don’t have an Apple Watch, you can use the Drafts app on the iPhone in a similar fashion, but it’s just not as streamlined as you can imagine.
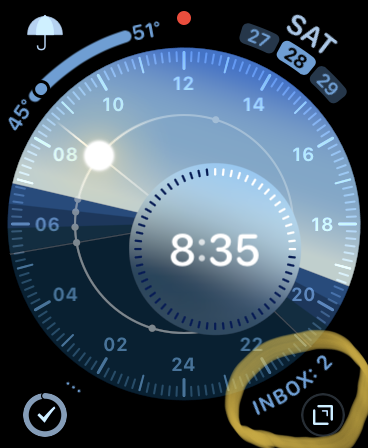
Podcasts — If I’m not listening to an audiobook, I am probably listening to a podcast. There is so much great content to learn from podcasts out there. My capture method is the same as when I am listening to an audiobook.
Web-browsing — If I am on a device and find something that sparks an idea while browsing the web, I will usually just share it from Safari directly into Ulysses. I can either send the main link and type my idea, or I can highlight text in the article and then use the share sheet to get both the link and that highlighted text into Ulysses. The nice thing is, I can either dump it in my main Ulysses inbox if I need to move on quickly, or I can choose the exact Ulysses group where I want it to land.
In some cases, a simple snippet of text or the URL to something isn’t enough. If I want to save something more involved or for longer-term retention, I use Keep It, which I found through a recommendation on The Sweet Setup. I also use Pocket to read stuff later (I’m still trying to figure out the best tools here and how to use Pocket for my needs).
Everything Else — Pretty much anytime I have an idea I either get it into my Drafts inbox to deal with later, or I open Ulysses and capture it there. It’s just a matter of how much time I have at that moment for capture. Drafts is the fastest by far!
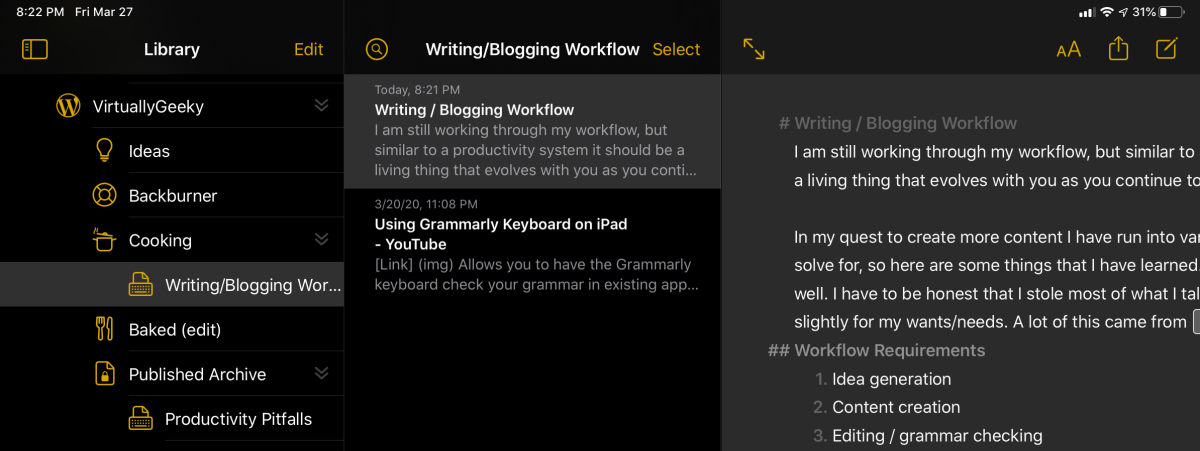
Once I have my ideas, I will poke at them now and again to add a little color or start to write a little bit. If I get spun up on one idea and start putting a lot into it, I will move it from Ideas to Cooking. That’s when I move into full-blown content creation.
Content Creation
“Moving the cursor from left to right,” as they say. Sometimes this is super easy, and other times something will stall out a little for me. Or, maybe my mind is really on another idea I have. If that happens, I move the idea to my Backburner group to keep it warm. While it’s there, I can continue to pick at it and keep it fresh. If it is no longer feeling fresh at all, I will move it back to the Ideas group, where I can always pick it up another time.
When things are clicking, it is more about finding the time to work on it (I have a busy day job). For this, I have to be somewhat opportunistic and chip away at it wherever I am that I can find that availability. Luckily, having an iPad with an external keyboard and cellular data makes writing anywhere a total breeze. This capability goes back to the ubiquity of Ulysses being on all of my devices and being in sync across them. So I can even tap away on my iPhone while using the bathroom if I feel so moved.
Sometimes an article is short and quick, and sometimes it is relatively lengthy with quite a bit of research and lots of thinking and re-working things. When I get into one of the more extensive articles or need to gather resources and research, I create a group in Ulysses for the material to keep track of it all easily. The resources and research can be links, images, pieces of information I want to incorporate or quotes, etc. This research gathering doesn’t have to only happen while I’m actively trying to finish an article. If I have an idea that requires a lot of research, I can create the group while it’s still in Ideas and start the gathering process over time. Then, once I feel like I have enough to get cracking and I want to work on it actively, I can move the whole group into Cooking.
Once the article feels complete, I then move it to Baked (edit) and move on to the grammar and editing phase.
Editing / Grammar Checking
I happened upon Grammarly while reading MacSparky’s blog and reading through his workflow. I’m just using the free version for now. I haven’t decided to pay for the Premium service yet because it’s not cheap (at the time that I’m writing this it is either $29.95/mo if you choose to pay monthly, $19.98/mo if you pay quarterly, and $11.66/mo if you pay annually) and I’m not sure if I will truly stick with blogging regularly. My track record hasn’t been stellar over the years, so I’m giving it time to see how I get along. If, however, I stick with this and get a better following, I will surely pay for it annually.
A couple of things about Grammarly: 1) It doesn’t work everywhere, and 2) It poses workflow challenges to work around. On workflow challenges, if I have any hope of sticking with blogging/writing, it has to have as little friction as possible. The good news is, I found a killer trick to make things easier!
The first problem of Grammarly not working everywhere really has to do with using a computer rather than a mobile device. I am 100% Apple, but the problem exists on Windows as well. There are plug-ins for Office on Windows (not on a Mac), but that still wouldn’t solve my problem since I use Ulysses for writing and barely ever use MS Word. Grammarly has browser extensions so that it can monitor your grammar as you type in a web browser, which is fantastic, but I found out it doesn’t work with WordPress.com and its new block editing. Mine doesn’t work at all in the blocks using Safari, but I read somewhere it should work on a per-block basis if you use Chrome as the browser. I don’t like Chrome, but even if I decided I would just use it for publishing my blog posts, it still wouldn’t consider the entire article for voice, tone, context, etc. So it’s less useful. Also, I write my posts in Ulysses, so it would be great to have Grammarly work right in Ulysses. No dice.
As I was writing this article, I was notified that Antidote, a competitor to Grammarly, now works with Ulysses. I looked into this as an option briefly, but it looks like the workflow isn’t much better, but is at least somewhat automated. The price is relatively high as well (it’s comparable to Grammarly if you pay yearly), and it didn’t seem that attractive to me. The iOS app isn’t anything more than a reference tool, similar to a dictionary or thesaurus, and since I am using my iPad so much, this was pretty much a deal-breaker for me. Plus, as you’ll read in the next couple of paragraphs, I think I have an excellent solution (for me).
Grammarly, then, creates a workflow challenge, because it doesn’t “just work” with my current workflow. My basic workflow is to write in Ulysses and then publish to WordPress as a draft. I then make sure all looks right on the web before actually scheduling when it will go live. So, to me, the best area to have Grammarly work would be in Ulysses, but it doesn’t. So most people are grabbing the text from Ulysses and pasting into the desktop Grammarly app, making the edits there, then copying and pasting it back into Ulysses. That’s not ideal, but I guess it’s workable.
I have been using my iPad for nearly all things I do lately, so I like to make sure whatever I do works well on the iPad. Ulysses works wonderfully, including publishing to WordPress from Ulysses on my iPad, but knowing that I need to check grammar, etc., I went to look for the Grammarly app on iOS. The only thing that exists is a Grammarly software keyboard. 😑 I never use a software keyboard on my iPad unless I leave my external keyboard at home and need to use the on-screen keyboard. I pretty much always use an external keyboard to type. That means, just like TextExpander’s keyboard, it doesn’t work as you type on the external keyboard. But, I searched to see if there was some way still to use the Grammarly functionality with an external keyboard and I happened upon a short video by “81gmedina” where she shows how she types with her external keyboard, then brings up the software keyboard and switches to the Grammarly keyboard. Once the Grammarly keyboard is up, you can tap on the “G” in the upper left, and it scans the entire body of text and then makes its recommendations!! I tried this in Ulysses on my iPad with a previous article that was very long, and it worked beautifully!!
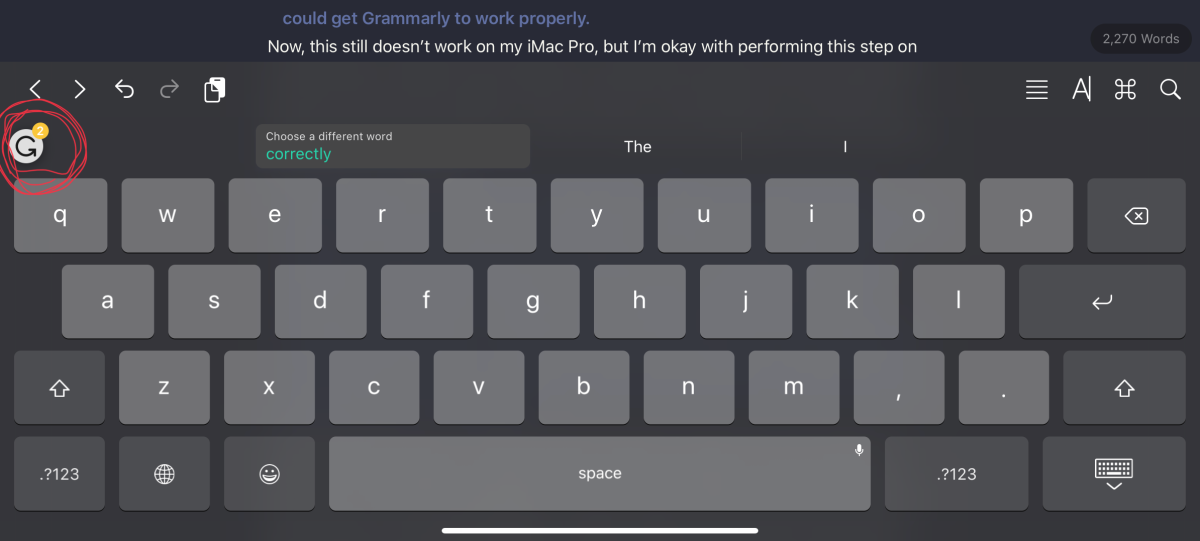
Note, on my iPad and my external keyboards, I had to tap-and-hold on the little down arrow on the bottom right of the screen to get the regular software keyboard to come up.

Once I did this, I was able to switch to the Grammarly keyboard and have it work successfully. I am guessing Apple made a change in the software that doesn’t allow what she was doing, or maybe it’s just her keyboard that works the way she shows. When I initially tried bringing up the keyboard selection without having the software keyboard already showing, I had to select something else before I could get Grammarly to show up and work properly. Finally, after you choose Grammarly as the keyboard, that selection persists even if you minimize it and continue to use the external keyboard, which means when you tap-and-hold that bottom right arrow to bring up the software keyboard, it brings up the Grammarly keyboard from then on… nice!
Now, this still doesn’t work on my iMac Pro, but I’m okay with performing this step on my iPad even if I happen to be working on my desktop. My iPad is never far away, and Ulysses synchronizes changes so quickly and well… this step is much less of a burden than trying to swap text in and out of Ulysses and Grammarly and the potential to lose links or formatting. I could even use Ulysses and the Grammarly keyboard on my iPhone for this step in a pinch, and that’s pretty badass!
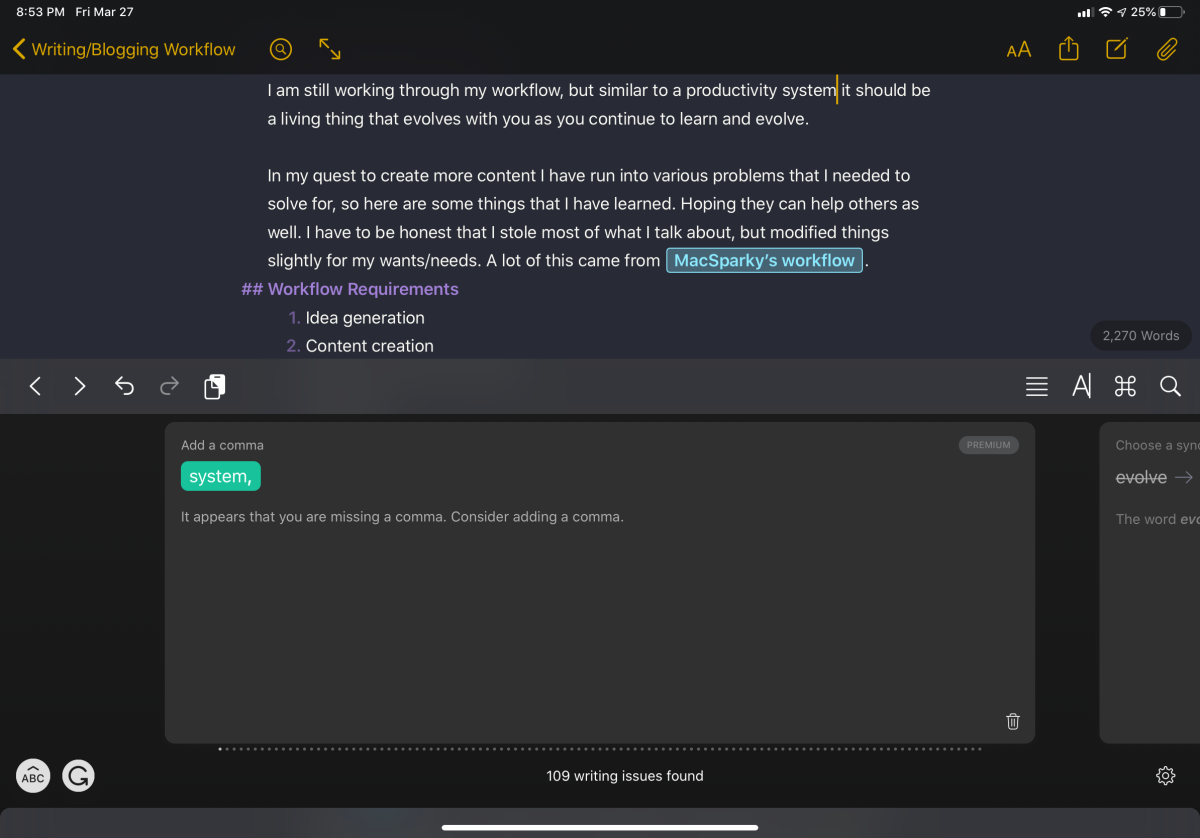
I originally started writing this article on March 20th when I only had a free account with Grammarly. I then received an email from Grammarly on March 26th, offering me 40% off for 48 hours only on a premium subscription. Based on the workflow trick I figured out above and the fact that I can use Grammarly for much more than just my blog, I decided to pull the trigger and bought an annual premium subscription for the 40% off the price (under $90 for the year, which came to something like $7/mo). I added a reminder in my calendar so I can choose to cancel before it renews if I find that I am not using it enough. Anyway, I am now a paying customer of Grammarly.
The editing portion I am referring to in this section is mainly reading through the article from top to bottom to make sure the thoughts are cohesive and in order. Sometimes I need to add words, sentences, or even whole paragraphs to make things work better. Each time I think I’m done, I need to run Grammarly against it again to make sure all is well.
Once I am happy with things, I publish to WordPress as a “draft,” meaning it isn’t truly published to the public yet, which leads to the reflection period.
Reflection
Once I publish the article as a draft on WordPress, I may immediately go through and check how things will look on the site for formatting and image placement, etc., depending on whether I have time at that moment. However, this initial phase isn’t to finalize things.
Then I wait at least 24 hours before reading through the whole thing as the end-user will read it and make sure it still makes sense, doesn’t need anything, and looks good.
If all of that leads me to believe it is ready, that’s when I schedule the article to be published. I have been scheduling posts to publish on Monday mornings at 6 am Eastern time, with the thought that people tend to check social media before their workday gets started. I have no idea if my timing is right, but so far, those posts have gained far more traction than anything I publish later in the day or week.
Publishing
One beautiful thing about WordPress.com (or your own hosted WordPress site) is the ability to schedule posts for a specific day and time and to automatically post to social media sites, so people see that you made a post. I know other blogging sites also have these capabilities, but the fact that WordPress.com does all of this on their free site AND that I can write my articles in Ulysses and publish to WordPress directly from Ulysses is a killer workflow for me. I am guessing I will eventually pay for a WordPress.com site to remove the ads, but for now, I am loving free.
Final Thoughts
Just while I have been writing this over the past week, a couple of things happened: 1) I received a notice that Grammarly was offering 40% off all of their plans for 48 hours only, and 2) WordPress.com offered me a 20% discount on a paid plan.
For Grammarly, I saw too much potential benefit for more than just blogging, and 40% off was too good to pass up!! For WordPress.com, I was going to skip it and stay with the free service. I already own my domain through a registrar, so I just didn’t see the point other than removing the ads, but I am trying to be cost-conscious. Before the discount expired, I decided to look at the pricing again. I was about to skip it and close the page when it hit me… I just spent $7/mo on Grammarly, and yet the “Personal” paid WordPress plan was only $4/mo without a discount, so I decided just to do it and bought a two-year Personal plan to remove the ads for my readers. With the 20% discount and the further discount applied for the two-year commitment, it comes out to only $2.80/mo! Not bad.
I figured it might be helpful to others to list the tools I use at the time of this writing:
- Drafts app for capturing ideas as they come to me
- Ulysses for writing (and several other things)
- Pocket and Keep It for web content research that is more than a snippet. I can link to things in Keep It with an x-callback-URL to get right to the content.
- Grammarly for spelling/grammar/voice/tone/etc
- WordPress app or web site for final polish and review… and also scheduling the post to be published
All in all, I am pretty happy with this workflow. I just hope the ideas keep coming and that I can find the time to keep writing for this blog. I am enjoying myself and hope others do as well.


